Why is protecting wood outdoors important?
Wooden fences, furniture, gazebos and sheds require protection from the elements. Painting and protecting wood can seem like a difficult and complicated task. By following the rules for painting wood, you can achieve the expected result and enjoy its durability.
If this is not done, then after the first season of use the wood will change color and begin to rot and crack. In a maximum of two or three seasons it will become unusable.
Why is this happening? The destruction of wood under the influence of weather conditions is a natural process. Wood is a natural material that reacts to contact with water and ultraviolet radiation. Wood’s biggest enemies are moisture, excessive sunlight and large temperature changes.
Additional Information! It is a hygroscopic material, which means it absorbs and releases moisture depending on the conditions. If there is too little water in the air, the wood dries out and loses volume: cracks, tears and deformations appear. When exposed to moisture, it swells and increases in volume, which also leads to its destruction. When exposed to intense solar radiation, it fades, turns yellow or gray.
Other problems include processes caused by mold and mildew that turn the wood blue. The activity of pests – insects – is also observed.
Selecting Tools
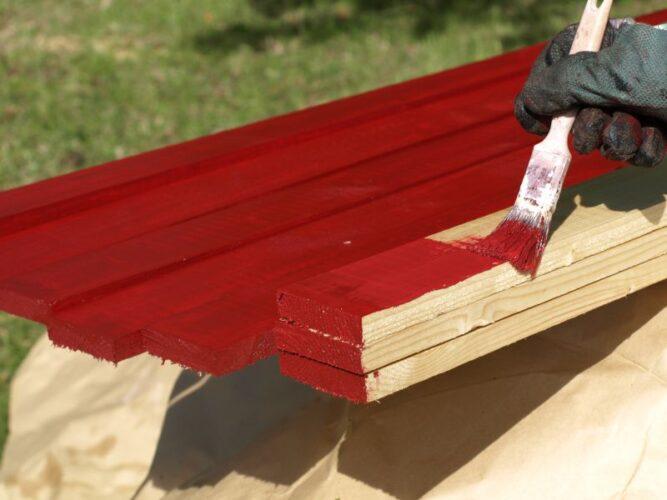
Various wood protection products can be used outdoors. You can choose impregnations, varnish stains, protective and decorative varnish.
Before purchasing, carefully calculate the required amount of product. It is also worth arming yourself with all the necessary tools: brushes, rollers. The final finish will not look good if the wrong brush or roller is used for application.
A roller will help you achieve greater efficiency when painting large surfaces. In addition, it does not leave streaks and uses less amount of the drug. When painting wood, choose short-pile rollers, which are ideal for smooth surfaces, or sponge rollers.
- Brushes with thicker bristles are best used for rough and rough surfaces, while brushes with soft bristles are best for smooth ones.
- Natural bristle brushes are suitable for solvent-based paints, and less so for water-based paints as they absorb water.
- Brushes with artificial bristles are flexible and do not absorb water. Therefore, they are intended for water-soluble drugs.
Additional Information! Read the instructions on the package carefully. This way you can avoid unpleasant surprises and get the necessary information about a particular product. Painting of wood should be carried out in accordance with the manufacturer’s recommendations.
Work should be carried out at appropriate temperature and humidity. The optimal air temperature for painting is from +5°C to +25°C, for base temperatures up to 40°C. The best painting results are obtained when painting at a relative humidity of up to 85%, the higher the drying rate of the coating is reduced.
How to prepare wood before painting
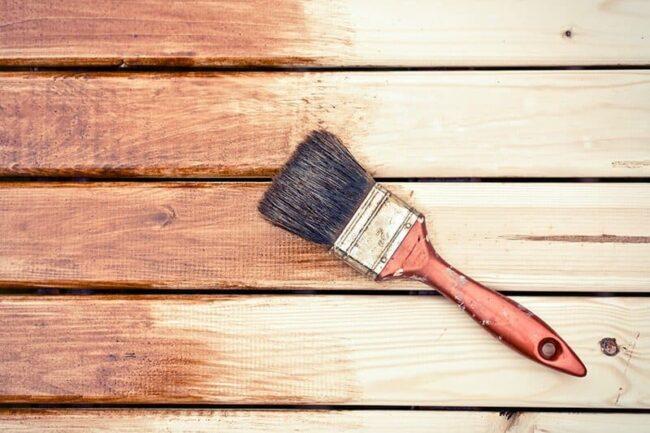
First you need to select products designed to protect and decorate these raw materials. Before painting, it is necessary to properly prepare the surface. This stage of work will significantly affect the appearance after drying. In the case of wood, it is necessary to sand it with sandpaper with a grain size selected according to the degree of surface unevenness.
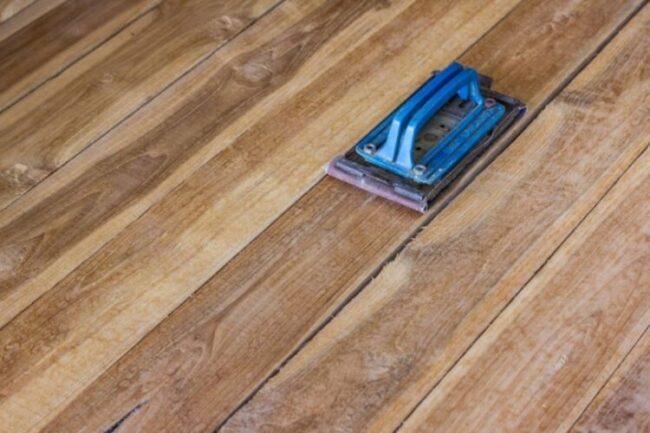
Small surfaces, recesses and edges are best sanded with sandpaper. In turn, large flat coatings are sanded using a grinding machine.
Priming a wooden surface
Wood requires protection with a primer. Priming is important not only for the durability of the wood, but also for the aesthetic appearance. Thanks to this treatment, the top coating will better adhere to the base. Ensures that paint is applied in an even layer on elements of garden architecture. A layer of primer will also provide effective protection of the wood from moisture and prevent it from darkening.
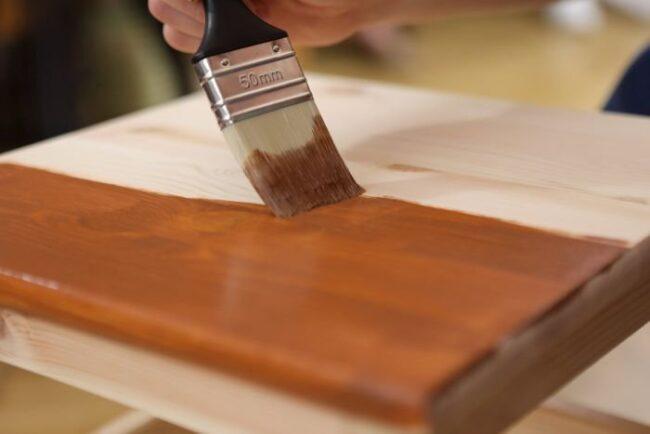
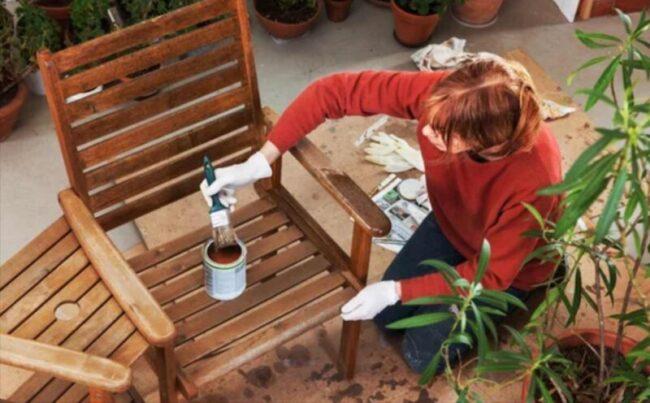
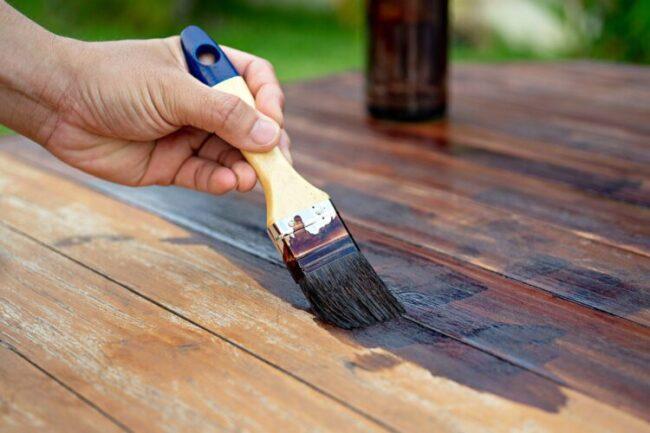
Impregnation is one of the most important stages, penetrating into the structure, creating a layer on the surface that insulates from moisture, UV rays, makes it resistant to pests, moisture, blue stains and mold, and at the same time gives the desired color. Impregnations are applied with a brush or roller, and then the excess product is rubbed into the fibers with a brush. After the first layer has dried, a second is applied to completely protect the wood.
It’s also a good idea to varnish the outside of the wood to give your pergola or gazebo a nice touch. Impregnations create a matte finish, and the wood feels natural to the touch.
Varnish provides a glossy finish. It does not contain biocides, so it will not protect against blue stains, mold and insects. However, it creates a layer that protects against moisture, UV radiation, scratches and mechanical stress. The advantage of varnish is that they impart beautiful color while leaving visible texture.
Varnishes work in the same way as stains, the only difference being that they are transparent and do not give the wood a different color. Lacquer stain not only colors the wood, but also allows you to obtain an elegant glossy surface.
How to paint wooden elements in the garden
Staining wood can slow down its aging and prolong its beautiful appearance. Protected wood when outdoors will not crack, swell, or become damaged as quickly as it would without any protection.
To paint old wood outdoors, the paintwork must be completely removed – even if there is no visible damage. To do this, remove the old layer of paint mechanically or using special chemicals.
For large surfaces, use a wood sander to make the job quick and efficient. You can also use sandpaper.
It is much easier and faster to get rid of the surface layer if you first coat it with a chemical intended for removing old coatings on wood.
The product is applied to the surface with a brush and then left to absorb for the time specified by the manufacturer. After this time, the coating will begin to soften, and then remove it with a spatula. Any remaining paint on the surface should be sanded down.
Carefully remove the dust with a damp cloth and then allow the wood to dry. The surface prepared in this way is ready for impregnation and painting. If there is grease or resin on the surface, you need to remove everything, simply rinse with white spirit and dry. The wood must have a uniform color, without stains or discoloration, for the resulting effect to be aesthetically pleasing.
After work, clean the tools with water or a suitable solvent, depending on the type of product used.